7 Basic Lighting Setups in Portrait Photography

This post outlines seven versatile lighting setups for portrait photography using a single light source. The positioning of the light significantly impacts the mood and texture of the photographs. The setups discussed include front lighting, side lighting, Rembrandt lighting, top lighting, under lighting, and back lighting, each creating unique visual effects.

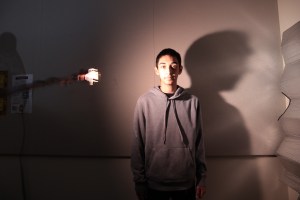
Using one light, you can produce 7 different photographic effects

There are seven lighting setups used in portrait photography. Using one light, you can produce seven different effects.

Lighting has an effect on the emotion and mood of the photograph. Simply by changing the position of the light you can change how your subject will look.

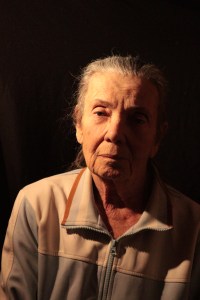
Front lighting produces a photograph that is flat with little texture.

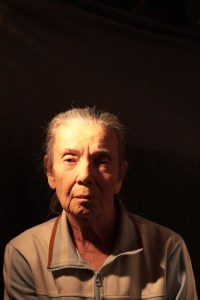
Side lighting will emphasize light, shadow and texture.

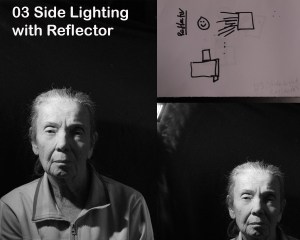
Side light with reflector will lighten the shadow.

Rembrandt lighting is classic for portrait photography.

Top lighting produces deep shadows under the eye, nose and chin.

Under lighting produces an odd mysterious look.

Back lighting will make a silhouette of the subject.

Side Lighting in Photography

Side lighting in photography creates captivating contrasts between light and shadow splitting the subject in half. This post shows you how to shoot using side lighting.

02. Side Lighting plays with shadows

Side lighting in photography creates captivating contrasts between light and shadow. It literally can spilt the subject in half. If you want to play with shadow, you can create some interesting photographs!

This image is shows an example of side lighting.
Side Lighting

How to Shoot with Side Lighting

Place the light directly to the side of the subject.

This image shows an example of side lighting, hand written diagram and light placement.
Side Lighting with diagram and light placement

Not only can you use side lighting indoors with a artificial lighting set up, you can use also use natural lighting. For example, you can place your subject next to a window with the light shining in.

This image shows side lighting of a Photo by Raphael Brasileiro: https://www.pexels.com/photo/smiling-young-man-leaning-on-wall-6441513/
Photo by Raphael Brasileiro

Learn to how to look at light and observe how shadows fall on your subject. You might just capture the perfect photo!

Side Lighting with Reflector

Using a reflector with side lighting softens shadows. This post shows you how to use a reflector with side lighting. It also shows you what type of reflectors can be used.

03. Side Lighting with Reflector softens shadows

Using a reflector with side lighting, softens the harsh shadow on the dark side of the subject.

How to use a reflector in photography

If you want to soften the dark shadows, place the light on one side of the subject and a reflector on the other side. The reflector will lighten the darkness. The light will be very bright on one side of face and cast soft shadow on the other.

You can use any thing that will reflect light. Foil, a car sun screen, or a professional reflector. They all produce the same effect.